Our front desk doorbell rang with it’s crude “trrrrr”.
It was my 3pm meeting with Donovan who brought in his fiancée to have her engagement ring resized.
I picked up the intercom and just caught the end of her sentence “… have to press it so hard, Don?”.
Mmm… We have some tension.
Come on in.
What Donovan thought was a free resizing was his second wrong assumption with this engagement ring. What Caelyn meant with the ring being too big was not referring to the ring size. That was actually surprisingly spot on.
No, she wanted a very fine and delicate engagement ring – her ring was far from it.
Now, I really don’t want rings we made out there that aren’t loved and adored so I quickly looked up and printed the design file. It was crafted exactly as per the design Donovan ordered.
Then I heard the most brutal line:
“Were you thinking of me at all when you chose this design?”
Brutal? Yes, way over the top. But she was onto something all ladies share. An engagement ring is the most precious and symbolic piece of jewellery she’ll ever wear. The expectation is there to have it uniquely hers. That’s just how it is.
I agree; a copy and paste of whatever’s popular, more often than not, won’t cut it.
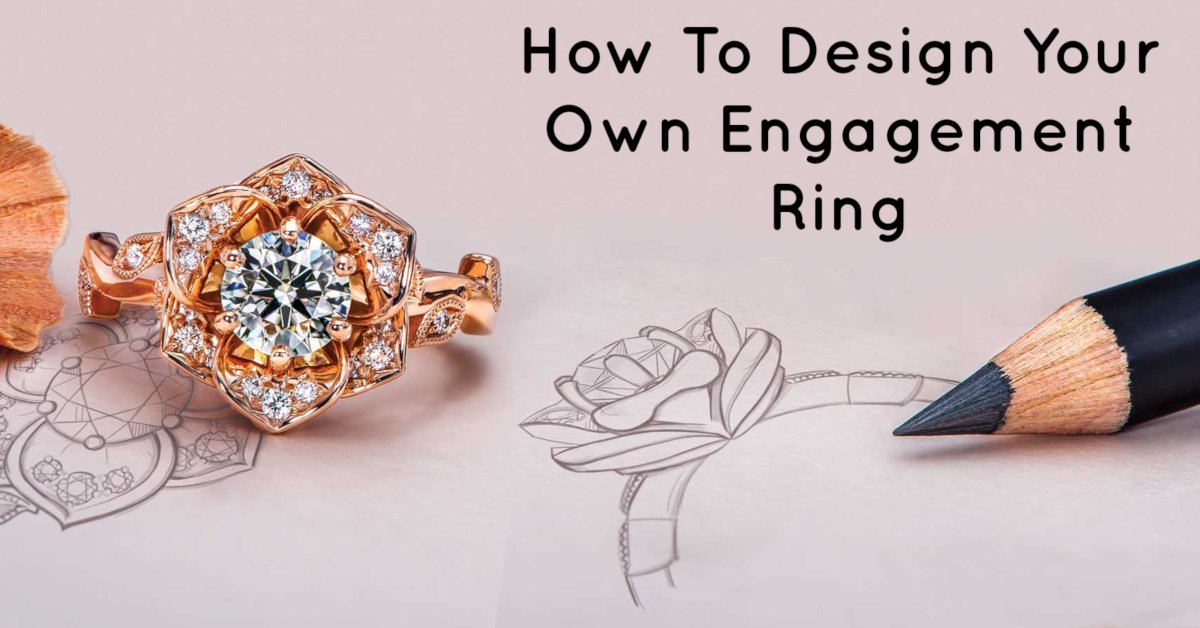
Although we’ve worked very hard on over 200 designs on our website we always encourage couples to consider adding a small detail to make it their own. It needs a little bit of… you.
Curious about costs? Let’s get that out of the way.
We use the exact same price list to calculate the price of custom rings than we use for our standard website designs. And that’s a pretty great price list by the way.
If we need to design something from scratch (working with you) there’s a design fee of R950. That’s almost free is you consider the many hours a designer will be busy fine-tuning your design to perfection.
More than 80% of our work is custom so we’re geared for it, we love it, it’s our oxygen.
Where to start?
The best way to jump in is to explain what questions a designer will ask, and mention some details and features you should look into.
You by no means have to have it all figured out, but although a great jewellery designer can be a bit of a mind-reader, they always need some guidance. This can be in the form of sketches, explanations or two types of photos;
“This is it!” photos.
If you’re lucky enough to find a single design you absolutely love – awesome.
Designs are used and reworked every day and there’s nothing new under the sun. I’ve never been fussy when other jewellers even manufacture our designs. It’s part of jewellery design. Woolworth can’t get exclusive selling rights on white T-shirts, and no jeweller has sole rights on a certain type of claw or small detail.
You’re free to get your inspiration from wherever you like. I’ll recommend a few sources in a few paragraphs.
“Mix and match” photos.
As you can imagine most dream rings ladies have in mind are mostly a compilation of a few different images and concepts.
A ring you saw online might be far from ideal in its totality, but it has a little detail you like, say, a very specific shape of curl you’ve fallen in love with. Those photos can be used to incorporate the small details into your own design.
Bonus marks: “I hate this” – photos.
These are more useful than you think! So, tag them along.
Let’s start exploring.
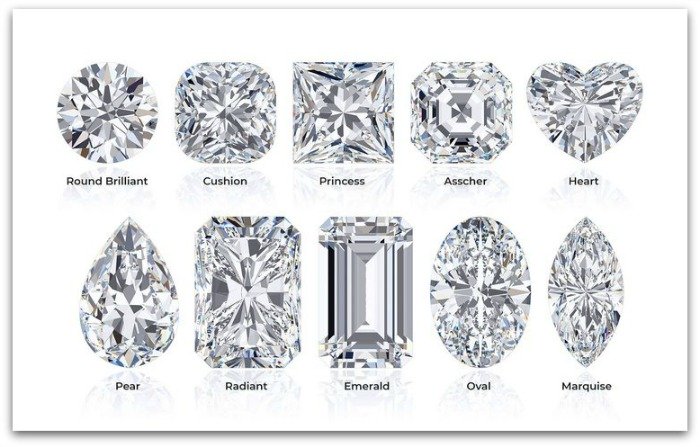
Step 1: Choose A Diamond Shape.
You probably have a specific diamond shape in mind, and that’s a great start.
The diamond shape is the cornerstone of any engagement ring design and you absolutely have to love it. Luckily you have quite a few stunning options to choose from.
Although there’s no right or wrong here, keep in mind certain shapes are more versatile than others. Most engagement rings are remade at some stage into a new design (say as a 10 year anniversary gift) and then freedom is golden.
A heart shape for instance might seem cute, but I’ve found that ladies grow tired of it as the years fly by. It’s also limiting design-wise as you lose styles like three-stone options that just look odd with a heart shaped diamond.
The most popular shapes at this stage are round, oval and cushion. Unless you have a very strong preference for another shape it’s best to stick to these three versatile and evergreen cuts.
Round Brilliant will always be the quintessential engagement ring diamond shape. It’s hands down the most popular diamond shape for a reason.
Oval shapes appear the largest and add a very nice vintage and creative feel to any engagement ring design. The elongated length of the shape also makes fingers look more elongated.
Cushions offer the most shine and life. They’re also the most bang for your buck with ridiculously good prices for what you’re getting. Being both roundish and cornered they’re the most versatile shape of the lot. My wife’s ring sports a cushion cut so it has my strongest vote.
Step 2: Choose A Basic Style.
Having a starting point of the “bigger picture” style of an engagement ring is necessary. Although you don’t have to find the perfect design image, the style you like frames the rest of the elements and is a great roadmap for your designer.
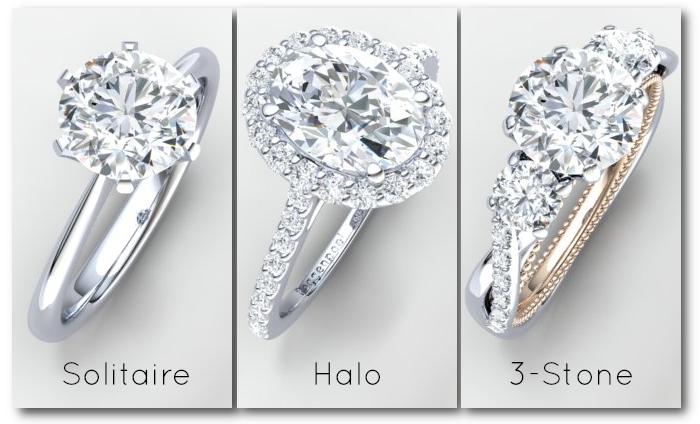
The three most popular styles currently are;
Solitaires are engagement ring designs that only feature a single diamond. They’re classic, classy, and always a safe bet. No one hates a solitaire. We’ve seen a rather exciting trend recently where couples explore thematic claws like floral motifs. Small details can really dress up any solitaire.
A Halo simply refers to a ring of diamonds around the centre stone. A halo has the great benefit of increasing the perceived size of the centre stone. The halo adds volume to the setting which creates room and space for more elaborate design features under the main diamond.
3-Stone rings: A large centre diamond, in the company of two matching side stones. This is often referred to as a trinity style when there’s a lot of symbolism involved. Trinities look best with larger diamonds and I’d recommend at least a 0,70ct for the middle diamond. These rings look expensive and have a very glamorous air to them.
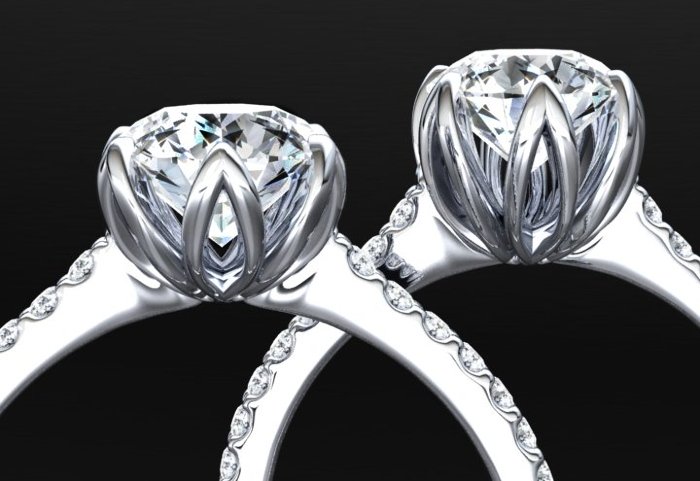
Step 3: High or Low? (Collet/Diamond Setting Height)
Some people prefer a diamond setting to be very high and all up in the air. This was very popular a few decades ago, so it creates a more old-school look. The problem is that these settings can be impractical in certain professions where it can easily hook onto things like latex gloves and fabric/materials.
The most common height is definitely the lower variation. It usually looks more harmonious with the design and is a far better practical bet. Be cautious of an overly low setting which also looks a bit weird and squashed.
Below are two acceptable heights at both ends of the spectrum in our Evaline design;
A good designer will be able to assure that the height is in perfect balance with all the other elements.
Step 4: Band Top View:
Regardless of the basic theme of an engagement ring the band that wraps around the finger can be fittingly shaped into a myriad of patterns. You really have some freedom here.
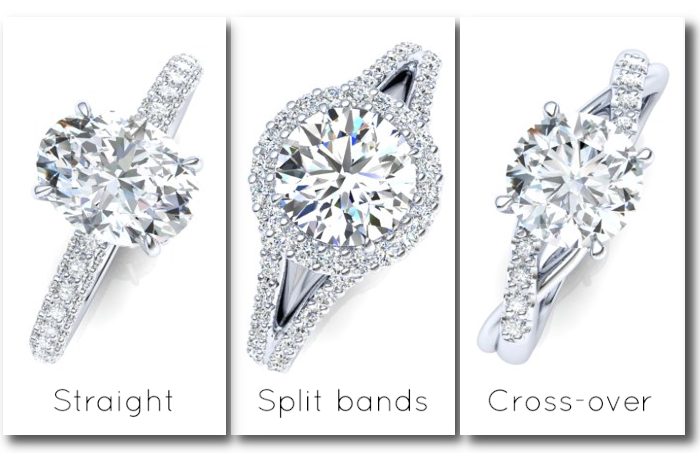
The band styles we most frequently design are;
Plain/Straight: This is the most popular band. Especially if the rest of the ring has a lot of detail. Also, if you’re going for a classic look this is your best bet as it does not draw any attention away from the main diamond. It’s distraction-free and clean.
Split bands: To add a little volume and intricacy to the ring the split band is a great feature. Visually and thematically it also helps to build up to the diamond making it the star of the show. It’s a modern, crisp and striking feature.
Cross-Overs: This is a love/hate element but still quite popular. This is a very organic feature and creates some movement in the design. If you’re looking for an artsy twist – a cross-over band might be a good idea. Just a word of caution – to create a nice flow in the band we need some room, so the crossover band is not quite suited for a small centre diamond. Anything over 0,70ct will do. Or just add a halo and you’re all set.
Step 5: Band Side View & Profile.
This is an often overlooked element that really affects the look of a design. It’s one of those areas that can make or break the look of a ring. Most inexperienced designers unfortunately graze over this.

For higher settings and collets, a cathedral profile is advised. It is a bold feature, and creates much needed space if you’re after detail like engraving on the side of your ring.
S-Shape (Built-Up): This is a softer profile and creates a great middle way. It presents finer than a cathedral setting if you’re after some height but find the cathedral too stark. It also adds finesse a nice flow to side-view.
For a modern unique look a round profile has been very popular recently. This doesn’t distract any attention away from the main diamond. Minimalism is the word that comes to mind.
Step 6: Setting Side View.
This is the area under and around where the main diamond is set.
So, this is where you and your designer have a bit of an open slate or canvas to add details that you like.
We’re seeing a resurgence of curls and swirls, but ironically enough also very minimalistic collets. The middle-ground seems to be missing in action in 2019.
In the image below you have the bare bones set-up on the left. You need a safe seat for your diamond, and something to hold it all together.
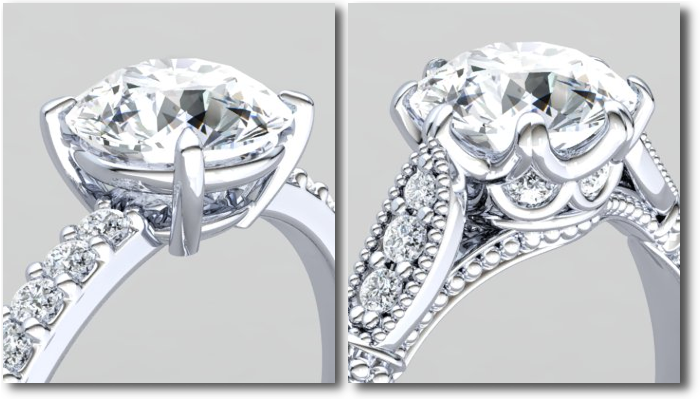
To the right you can see how complex things can get. The sky’s the limit so explore to your heart’s desire.
Where to get ideas?
I hope the areas discussed above have helped you with some basic terminology and ideas to consider. Now it’s time to get some ideas.
The best way to find elements you love is by looking at a lot of engagement rings. Either in person, or online.
You’re more than welcome to visit us and try on some of our design, but for broad browsing nothing beats the thousands of designs you can find online for #ringspiration.
These would be my go-to sources;
- Our Instagram and Facebook pages are really a pot of gold. We do our best to show-case the latest trends while keeping it varied. You’ll see great and unique ideas, and it’s very active with daily posts.
- Browse jeweller’s websites. On some sites like ours you have a lot more information to work with than you would when browsing social media for ideas. You’ll get some interesting and helpful comments from the designers.
- Pinterest has been a great tool over the years to curate and sort your ideas. Screenshots in folders can also work.
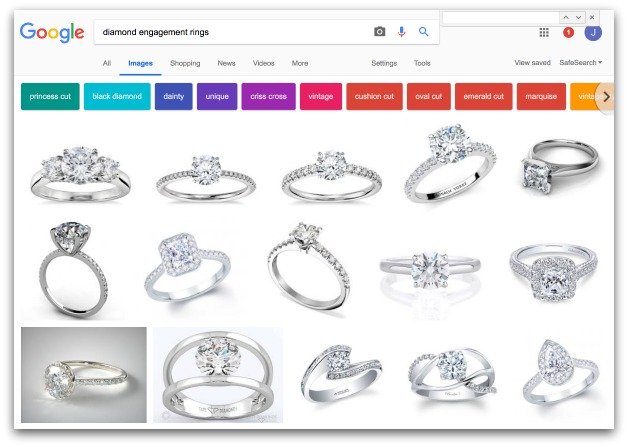
- Google Images is a great tool. Simply type in the name of a certain element or style and you’ll be greeted with an endless stream of ideas and designs.
- Talk to a good designer! Sometimes all the browsing in the world can’t match sitting down, one-on-one, with a designer and bumping some ideas around.
Problems with some of the engagement ring photos you’ll see online.
Although the internet is a great tool for inspiration… it’s also full of impractical and poor designs.
A lot of the designs you see online are merely renderings of digital designs, and not photos of actual rings.
Some rules of creating actual durable engagement rings aren’t always adhered to.
Remember, you’re often dealing with images created for advertisements. And as you’ve learned these “photos”, just like models in fashion magazines, have been severely edited.
For what it’s worth, we never edit any photo of a design we post on social media or use in advertisements.
The two types of problematic images to look out for online:
- Main diamonds that aren’t secured in place by safe, large enough, claws. Fine claws look nicer, but there’s a limit where it just gets risky if they can easily bend and break. There’s no way around this.
- A lot of designs are shown with massive centre diamonds that are considerably larger than the upper side of normal. The size of the center stone greatly affects the appearance of an engagement ring. In 99% of cases larger does look better. Sometimes it’s just impossible to merely scale down the exact design and retain it’s essence.
That brings us to…
Why you want to work with a very experienced designer.
If you’re looking for a truly special engagement ring, just any designer you happen to cross paths with won’t do.
Not everyone that can draw a ring is a designer.
Putting together a bunch of elements in a ring is easy. Crafting it all into a harmonious piece with stunning proportions… that’s the difficult part.
Amateur designers create average pieces, regardless of your input.
This engagement ring needs to be uniquely you, and the only way to get there is by working with a designer who can imprint a little bit of your personality into this piece.
It’s also great fun.
Experienced designers will take a shot in the dark with ideas, sketch a few lines and work solely on your reaction. That’s the personal touch and attention your ring deserves.
Don’t settle for something that’s close enough to what you’re looking for.
We can help you get it perfect.
We’d love to work with you.
Regardless of whether your just starting the browsing process, or have your design ideabook all filled up – you’re invited for a coffee with one of our designers.
I know we have the absolute best design talent available in South Africa and you’re more than welcome to put this to the test.
Get in touch today and save yourself a lot of time.
We have studios in Rosebank and Pretoria, and look forward to having you over.
You can reach us at info@poggenpoel.com or dial the numbers listed below.
Take care.
Kind Regards,
Johan Poggenpoel, Co-Founder.
T; 012 111 0525 (Pretoria) | 010 020 6811 (Johannesburg)
E; info@poggenpoel.com
Instagram: https://www.
Facebook; www.facebook.com/poggenpoel

